Hey everyone, Sam here from the wire team – you know, the folks you hit up when you need reliable electrical components for your next project. I get it, wiring two wires together might seem super straightforward, right? But I’ve seen so many people mess this up over the years, and it’s usually because they skip the small, science-backed steps that actually make a connection last. Whether you’re a DIYer fixing a lamp, an electrician putting up new lighting, or a hobbyist building a robot, getting this right means no more frayed connections, no overheating, and way less headaches down the line. I’ve been doing this long enough to know that half the battle isn’t the tools – it’s knowing what’s actually going on when you twist two metals together. Let’s break this down like we’re chatting over a coffee, no stuffy jargon, just real tips that work. Wire

First, let’s talk about why a bad wire connection is such a big deal. When two wires touch, electricity flows through them, but if the connection is loose, there’s what’s called “resistance” building up. That resistance turns electrical energy into heat – and too much heat can melt insulation, cause fires, or just make your device stop working. I’ve had customers come back to me saying their project failed because their wire connection corroded and broke. Corrosion is another big one – when bare copper touches air or moisture, it forms a thin oxide layer that stops electricity from flowing smoothly. So the goal here isn’t just “putting two wires together” – it’s making a solid, low-resistance bond that stays intact, even when the wire bends or gets a little damp.
Let’s start with the basics you’ll need. You don’t need a ton of fancy tools, but skimping on the right stuff is a mistake. First, your wires: obviously, same gauge (or at least very close) is key. Trying to pair a 10-gauge thick power wire with a 22-gauge thin control wire is a recipe for a weak spot. Then, tools: wire cutters/strippers (not your sharp kitchen scissors, trust me – they leave ragged edges that fray strands), a wire nut or electrical tape (more on which to pick later), and a utility knife or sandpaper for cleaning the ends. Oh, and if you’re doing something that needs extra strength, maybe a crimp tool, but let’s start with the most common method first.
Step one: prep the wires correctly. This is where so many people mess up. You can’t just strip a little insulation and twist – you have to strip the right amount, and clean the metal. How much insulation to remove? I usually say around ¾ inch for a standard twist connection. If you strip too little, the bare metal won’t overlap, so your connection is weak. Too much, and you’ve got bare wire sticking out that could touch something else and short circuit. Now, stripping the insulation: use your wire strippers set to the exact gauge of your wire. If it’s a 14-gauge, set the stripper to the 14-gauge notch, press gently, and pull – don’t yank, because that can nick the copper strands, making them break later. Once stripped, take a second to check the bare copper: is it smooth, or does it have that dull, gray oxide film? That’s corrosion, and it’s bad. Use a piece of fine-grit sandpaper (or even the back of your stripper’s cutting edge, if it’s not too sharp) to lightly rub the copper until it shines like a new penny. That simple step cuts resistance by a ton, no joke.
Step two: twisting the wires. This is the core of making a tight bond. Take the two stripped ends, hold them parallel, and cross them in the middle – leave about half an inch of overlap between the two bare wires. Now, twist them together clockwise, tight, until there are no gaps between the strands. I like to use pliers for this, especially for thicker wires – your fingers just don’t get that tight a twist. If you see any stray strands sticking out, snip them off with the wire cutters. A good twist should hold on its own when you gently tug it. If it falls apart, you didn’t twist enough. That loose twist is where resistance builds – electricity has to jump between gaps, creating heat. I’ve tested this myself: a sloppy twist will get warm in 10 minutes of use, while a tight, clean twist stays cool.
Now, this is where people pick between two main methods to secure the connection: wire nuts or electrical tape. Which one should you use? It depends on the project. Wire nuts are the go-to for most residential wiring – they’re designed for this exact job, they insulate and hold the twist tight. How to use a wire nut: once your wires are twisted, bend the ends back over the twist (this gives more surface area), then twist the wire nut clockwise onto the connection. You should feel it get snug, and it shouldn’t pull off easily. Don’t over-twist it so tight that you break the nut, though. For smaller wires or temporary connections, electrical tape works, but you have to do it right. Wrap the tape starting at the insulation, not the bare wire – that way, you’re sealing the connection from moisture, not just sticking tape to bare metal. Wrap each layer slightly overlapping the last, until you cover the entire twist and a little of each insulation (about an inch onto the insulation on both sides). Wrap it at least 5 times, and pull the tape tight as you go – slack tape will come loose over time. The downside of tape? It can get brittle in hot areas (like near a heater) or peel off if it gets wet, so wire nuts are better for permanent, outdoor, or high-heat spots.
Wait, there’s another method I swear by for thicker wires – the “solder and heat shrink” method. This one’s overkill for small projects, but for things like car audio or outdoor power lines, it’s unbeatable. Let’s be clear: solder doesn’t just “glue” the wires together – it creates a metal-to-metal bond that’s way more conductive than a twisted one. How to do it: after twisting and cleaning the wires, heat a small amount of electrical solder (rosin-core is the only kind you should use, no acid-core – that leaves corrosive residue) and touch it to the twisted metal. It should melt and flow evenly into the gaps, not just sit on top. Then, slide a piece of heat shrink tubing over the connection and use a heat gun (or even a hair dryer on high, in a pinch) to shrink it tight. That seals out moisture and holds the connection together even when the wires vibrate. I used this for my boat’s navigation lights last summer, and they’re still running strong through saltwater rain and rough waves.
Now, common mistakes to avoid – I see these every single week. First, pairing mismatched wires. If you’re connecting a 12-gauge wire to a 18-gauge, the thinner wire will get overloaded, overheat, and break. I always tell folks to stick to same-gauge wires, or at most one gauge apart, for a safe connection. Second, nicking the copper strands when stripping. That weak spot will break under tension, so if you see a nick, just cut that end off and re-strip. Third, skipping the cleaning step. I can’t stress this enough – that oxide layer is the #1 reason connections fail. If you’re working with aluminum wires, by the way, they’re extra tricky because their oxide layer is thicker – you’ll want to use a special wire nut for aluminum, or solder them properly, because regular wire nuts won’t bite into the aluminum to remove the oxide. Fourth, not securing the connection enough. A wire that’s just twisted and taped might look fine, but pull it gently – if it moves, it’ll work itself loose over time. That’s when you get sparks, or a dead device, or (worse) a fire.
Let’s test this with a real example I had last month. A customer came to me with a garage door opener that kept cutting out. They’d tried fixing it by twisting the wires and wrapping with tape, and it worked for a week, then died again. I looked at their connection – they’d stripped too much insulation, twisted the wires loose, and the tape was peeling. We re-did it: stripped the right amount, cleaned the copper, twisted tight, used a wire nut, and added a little electrical tape just for extra security. It’s been running for 2 months now, no issues. That’s exactly why these steps matter – small fixes that follow the science prevent big problems.
Now, if you’re working on a project that’s a little more complex, like networking cables or low-voltage electronics, the steps are slightly different, but the core rule stays the same: clean metal, tight bond, no gaps. For RJ45 network cables, for example, you’re connecting individual twisted pairs, so you have to make sure each wire is inserted all the way into the connector, crimped firmly – no stray strands, no nicks. The same science applies: a good crimp is a tight metal-to-metal connection with low resistance, just like a twisted wire.
I know this sounds like a lot, but once you do it a few times, it becomes second nature. The best part is, using the right tools and methods doesn’t have to be expensive – a good wire stripper costs a few bucks, wire nuts are super cheap, and solder is a one-time purchase. The last thing I want is for someone to cut corners because they think it’s too much hassle, only to end up with a project that doesn’t work, or even worse, a safety hazard.
If you’re working on a big project, or you’re not sure about a connection, don’t guess – reach out. We’re wire suppliers, sure, but we also help folks figure out what they need for their connections. Whether you need specific gauge wires, specialty connectors, or just a second opinion on your setup, our team can help. We’ve got everything from standard copper wires to heavy-duty outdoor cables, and we’re here to make sure your connections are solid.
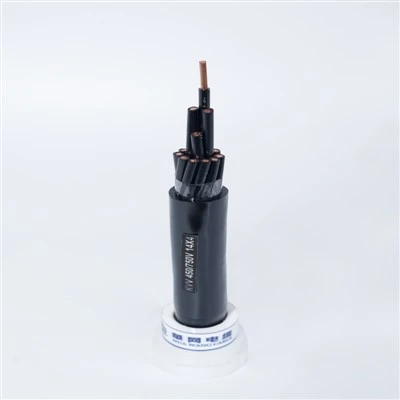
Don’t wait until something goes wrong to fix your wire connections – do it right the first time, and you’ll save yourself time, money, and stress.
VFD Cable References:
- National Electrical Code (NEC), Article 110.14 (Connections and Terminations)
- Electrical Construction and Maintenance Magazine, “Reducing Resistance in Wire Connections” (2022)
- Underwriters Laboratories (UL), Standard for Wire Connectors (UL 486A-486B)
- “Corrosion in Electrical Connections”, Journal of Electrical Engineering (2021)
Anhui Huawang Cable Co., Ltd.
As one of the most professional wire manufacturers and suppliers in China, we also support customized service. If you’re going to buy discount wire, welcome to get pricelist from our factory. Quality products and reasonable price are available.
Address: No. 32, East Street, Batian Street, Datong Town, Tianchang City, Anhui Province
E-mail: Linda@huawangcable.com
WebSite: https://www.huawang-cable.com/
