If you’ve ever spent time googling “multi-layer optical tint installation,” you’ve probably seen a mix of takes—some installers calling it “a breeze,” some DIYers complaining it’s “way harder than they thought.” As someone who’s been supplying multi-layer optical tint for 8 years now, I’ve helped hundreds of installers, and even a few brave DIY folks, work through this question. Today, let’s break it down straight: is it actually easy to install? Spoiler: it’s not as simple as throwing a roll of basic window tint on your car, but it’s way more doable than a lot of people make it sound. Let’s dive into what actually matters here. Multi‑Layer Optical Tint
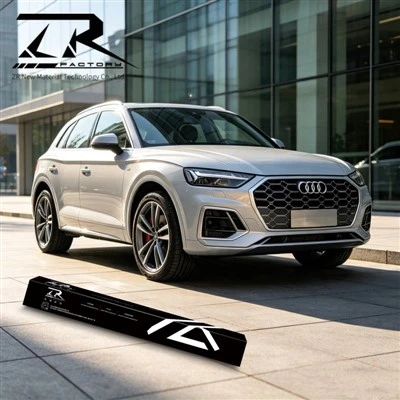
First, let’s get clear on what multi-layer optical tint even is, because that’s the first big difference between it and the tint most people have experience with. Basic tint you buy at a auto parts store is usually 1-2 layers: a thin polyester base, maybe a dye or a single metal coating to block light. Multi-layer optical tint? It’s 7+ ultra-thin layers, each only a few atoms thick, stacked together. That’s why it’s so good at what it does—blocks 99% of UV rays, cuts glare without darkening your windows to near-black, keeps heat out way better than basic tint. But those tiny layers mean two things: it’s way more sensitive to mistakes, and it requires a couple of specific tools (not just a razor and a squeegee) that most DIYers don’t have off the bat.
I can’t tell you how many times I’ve gotten a call from a DIYer who ordered our tint, emailed me a pic of their work, and said, “I messed up—why is it bubbling?” And 9 times out of 10, they skipped the two key prep steps that make multi-layer tint way easier to install right. Let’s talk about prep first, because that’s 70% of a good tint job, no matter what type you’re working with. For basic tint, you might scrub your window with a ammonia cleaner, a quick rinse, and call it a day. For multi-layer optical tint? You have to go deeper. We always tell installers (and DIY folks) to use a isopropyl alcohol solution (70% concentration, not the 91% stuff—too harsh) and a microfiber cloth to scrub every inch of the window, then wipe with a lint-free paper towel, then rinse with distilled water (tap water has minerals that leave spots) and dry with a squeegee. That extra step sounds annoying, but it’s what keeps dust and lint from getting trapped under those thin layers of tint. I’ve had installers tell me this prep takes 15 extra minutes, and it cuts their bubble rate by 80%. That’s not a hard thing to do—it’s just a thing a lot of people skip.
Next, the tools. You don’t need a fancy $1,000 machine or anything, but you do need specific stuff that most DIYers don’t have. Let’s list them: a sharp utility razor blade (new, not the one you used to open boxes last week), a heat gun (not a hair dryer—hair dryers only get to 140°F, heat guns hit 300°F, which is exactly what you need to stretch the tint without burning it), a felt squeegee (not the hard plastic one for basic tint—felt keeps from scratching those delicate layers), and a spray bottle with that same isopropyl-distilled water mix I mentioned earlier. If you’re missing the heat gun? Good luck. Multi-layer tint is pre-cut for most cars (we offer custom pre-cuts for 200+ car models, which is a game-changer) but you still need to shape it to fit the window perfectly, especially for curves. Without the right heat, you’ll end up with wrinkles that you can’t smooth out. I’ve seen DIYers try to use a hair dryer, and they either burned the tint (turns it brown and useless) or left huge creases that required them to peel it off and start over. That’s not the tint’s fault—that’s the tool fault.
Now, let’s split this up: is it easy for a pro? vs. is it easy for a DIYer? Because that’s the biggest split here. For professional installers who do tint jobs 2-3 times a week? It’s actually pretty straightforward. They’ve got the prep down, they know how to use the heat gun, they have the patience to work slowly around window edges without cutting too deep. I work with a lot of independent installers who’ve been using our multi-layer tint for years, and half of them say it’s easier than basic tint now that they’re used to it. Why? Because it’s more forgiving once it’s applied right. Wait, let me explain that: basic tint is sticky almost immediately, so if you make a move, you can’t reposition it without leaving a bubble or a tear. Multi-layer tint has a “wet” adhesive layer that takes a minute to set, so if you shift it a little to line it up perfectly, no big deal. Pros love that—means less waste, faster jobs, happier customers.
For DIYers? Let’s be real: it’s doable, but it’s not for someone who’s never tinted a window before. I’ve had a few customers who were first-timers, watched a couple of YouTube tutorials, and nailed it. But most of the DIY questions I get are from people who tried once, messed up, and asked if they can buy a new roll. Here’s why: multi-layer tint is thinner than basic tint, so it’s way easier to tear if you’re not careful around edges. And if you’re not used to stretching it with a heat gun, you’ll either leave it too loose (wrinkles) or too tight (tears). The good news is, we send a free installation guide with every roll, and if you reach out, my team will hop on a quick 10-minute call to walk you through any step—no extra charge. A lot of suppliers don’t offer that, which I think is why people think it’s harder than it is.
Wait, let’s talk about the most common myths I hear, because those are the big things that make people think it’s hard. First myth: “Multi-layer tint is impossible to install without a professional.” No, that’s not true. I had a customer last month who installed it on his truck by himself—he followed the guide, took his time, and sent me a pic that looked perfect. He told me it took him 2 hours, which is way faster than I expected for a first-timer. But here’s the catch: he didn’t rush. He spent 30 minutes prepping his window, took his time stretching the tint, and only used the heat gun on low. The second myth: “It’s way more expensive and requires special equipment.” Let’s check: the tools you need for multi-layer tint are the same tools you’d use for a lot of other home projects. A heat gun works for stripping paint, a razor blade is for cutting, a squeegee is for cleaning windows. And our pre-cut rolls are priced almost the same as high-end basic tint, so you’re not paying a premium just for the “multi-layer” name.
Another thing that makes it easier now? Custom pre-cuts. A few years ago, you had to cut your own tint to fit each window, which was a big barrier for DIYers. Now, we offer pre-cut multi-layer tint for almost every car, truck, and SUV on the road. That means you don’t have to mess with cutting straight lines or matching curves—you just peel the tint to size, line it up, and stick it on. I can’t tell you how many installers tell me pre-cuts cut their job time in half. For a DIYer, that’s the difference between a 4-hour job and a 2-hour job, which is way less overwhelming.
But let’s be honest about the downsides, because this isn’t a sales pitch (well, it is, but a real one). If you’re the type of person who wants to finish a project in 30 minutes, no mistakes? This isn’t for you. If you get frustrated easily when things don’t go right the first time? You might want to hire a pro. Multi-layer tint is durable, but if you install it wrong, you’ll end up with bubbles, tears, or spots that look cloudy. And unlike basic tint, those mistakes aren’t easy to fix—peeling it off can damage your window’s defroster lines, which is a whole other headache.
Let me give you a real example. Last year, a customer from Texas ordered our multi-layer tint for his Tesla Model 3. He was a DIY guy, had never tinted anything before. He skipped the distilled water step, used tap water, and ended up with a bunch of mineral spots under the tint. He emailed me panicking, and I told him how to fix it: get a lint-free cloth, a little rubbing alcohol, and gently peel back the edge of the tint (slow, so you don’t tear it), clean the window, and reapply. It took him an extra hour, but he got it right. If he’d hired a pro, that mistake would never have happened—pros know to use distilled water, and they have the skill to fix small issues on the fly.
So, back to the original question: is multi-layer optical tint easy to install? The short answer is: it’s easier than people make it sound, but it’s not “easy” in the same way as the cheap tint from the auto parts store. It’s about 2 out of 10 for a professional (10 being super easy), and about a 5 out of 10 for a DIYer. If you take your time, follow the prep steps, use the right tools, and don’t rush, you can do it. If you’re in a hurry and you’ve never installed tint before, it’s probably better to find a local installer—we work with hundreds of installers across the country, so if you don’t know who to pick, we can point you to someone reliable.
Here’s the thing about multi-layer tint that most people miss: it’s not just about the layers. The installation is what makes it perform like it’s supposed to. If you mess up the install, you won’t get that 99% UV block, that glare reduction, or the heat protection that makes it worth the money. That’s why we don’t cut corners on the installation support—we want you to get the best result possible, whether you’re a DIYer or a pro.
If you’re thinking about buying multi-layer optical tint, the best way to make it easy is to work with a supplier that actually cares about your install, not just the sale. We send step-by-step guides, answer calls anytime during business hours, and even offer sample kits so you can practice installing on a small piece of tint before you do your windows. I’ve had customers who used the sample, messed up once, practiced, and ended up with a perfect job on their car. That’s the kind of support that makes installing multi-layer tint way less stressful.
At the end of the day, it all comes down to patience. If you’re willing to take an extra 15 minutes prepping your window, 10 minutes stretching the tint, and don’t cut corners, it’s totally doable. If you’re just looking for a 30-minute project, this isn’t it. But if you want a tint that’s going to last for 10+ years, keep your car cool in the summer, and protect your skin from UV rays, the install work is worth it.
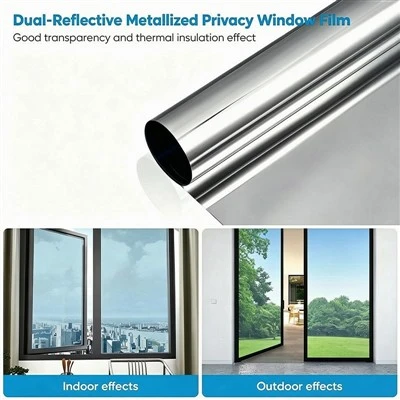
If you’re ready to order, or if you have more questions about installation, feel free to reach out to our team. We can help you pick the right tint for your car, send over the installation guide, or connect you with an installer in your area if you’d rather leave it to the pros. No pressure, just straight answers.
Residential Window Film References
- International Window Film Association. (2022). Installation Best Practices for Multi-Layer Optical Window Tint.
- SAE International. (2021). Performance Standards for Thin-Film Automotive Window Tint Products.
- US Department of Energy. (2020). Solar Heat Gain Coefficient Comparison of Single-Layer vs. Multi-Layer Window Tint.
- Consumer Reports. (2023). DIY vs. Professional Window Tint Installation: Cost, Durability, and Performance.
Shaoxing Zirui New Material Technology Co., Ltd.
We are one of the most professional multi‑layer optical tint manufacturers and suppliers in China, also support customized service. We warmly welcome you to wholesale cheap multi‑layer optical tint for sale here and get quotation from our factory. For price consultation, contact us.
Address: Building 23, Phase II, Huanpu International Industrial Park, No.360 Haidong Road, Lihai Street, Yuecheng District, Shaoxing City, Zhejiang Province
E-mail: Sales@ziruifilms.com
WebSite: https://www.ziruifilms.com/
